

Panel title
You can add translated versions of each article in your Help Center, or add articles only in specific languages. The Help Center displays pages in different languages based on locale code in the page URL. Example, ".../hc/en-us". Users can also manually switch to a different language by selecting it from the language menu.
Multi-language support is available on the Plus and Enterprise plans.
Basic localization workflow
Here's the workflow for localizing Help Center in multiple languages:
- Configure Help Center to support your other languages. See Specifying languages below.
- Add content to Help Center in your default language. See Working with articles in the Contributor Guide to the Knowledge Base.
- Get the content translated in your other languages.
- Add the translated content to Help Center. See Adding translated pages and Adding translated text below.
Many of the pre-built page components used in Help Center are already localized. For example, the component that lets users vote on an article displays "Was this article helpful?" in English and "Cet article vous a-t-il été utile?" in French. You don't need to localize the strings. See the Help Center template component reference for the list of components.
It's a good idea to establish a localization process for ongoing additions and updates to Help Center.
Specifying languages
You must specify a default language and the other languages you want to support in your Help Center. You can also specify a different name for Help Center for each of your supported languages. For example, if you named your Help Center "Knowledgebase" in your default language, you can use "Base de connaissance" for the French version.
To set up Help Center for multiple languages
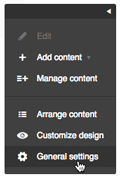
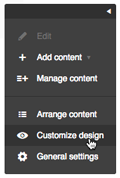
- In Help Center, click General Settings in the tools panel on the lower-right side of the page.
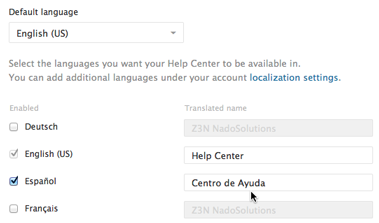
- On the General Settings page, select your default language.
You can set a default language for Help Center that's different from the agent interface in Zendesk.
- Select the additional languages you want to support.
The available languages are defined using the Account page in Zendesk. See Configuring your Zendesk to support multiple languages.
- If you want, enter a translated Help Center name for each of your languages.
- Click Update to save your changes.
Adding translated pages
You can add translated versions of existing pages. You can also add translated pages that don't have versions in other languages.
When you add translated versions of existing pages, the original article and its translated versions share the same URL except for the locale. This feature can simplify managing your content. For example, the following URLs point to the U.S. English and French versions of the same article:
https://mondocam.zendesk.com/hc/en-us/articles/202529393
https://mondocam.zendesk.com/hc/fr/articles/202529393
Important: Any translated page must have a parent page translated in the same language. The page hierarchy is as follows: Category landing page > Section landing page > Article. For example, if you add an article translated in German, the article must have a German section landing page. In turn, the German section landing page must have a German category landing page. The Help Center cannot display orphan pages. For more information on the page hierarchy, see Anatomy of the Help Center.
When localizing your Help Center, it makes sense to start by adding localized versions of category landing pages, followed by section landing pages, followed by articles. This workflow guarantees that any new translated page has a parent page -- a section or category landing page -- that's translated in the same language.
To add a translated version of an existing page
- After signing in as a Help Center manager, navigate to the existing page. The page can be an article, section landing page, or category landing page.
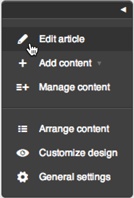
- Click Edit this article in the tools panel on the lower-right side of the page.
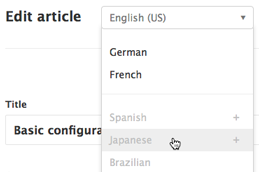
- Select the new language of the content from the list at the top of the page.
- Enter or paste the translated content into the form.
- Click Add to create the translated version of the page.
- Repeat the steps to add more translated pages.
To add a translated page with no version in another language
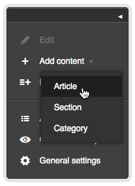
- After signing in as a Help Center manager, click Add content in the tools panel on the lower-right side of any page, and then select the kind of page you want to add.
- Select the language of the content from the list at the top of the page.
- Enter or paste the content into the page.
- Click Add to create the translated page.
- Repeat the steps to add more translated pages.
Adding translated text
- A welcome message on the home page
- A company tag line in the header
- A legal notice in the footer
- Service alerts
This functionality uses the dynamic content feature in Zendesk. For localization purposes, dynamic content is not meant to be used for articles, titles, and other Help Center components that support multiple languages. See the rest of this article and the Help Center template component reference for more information.
Specifying the language variants of the text
You specify the language variants of a snippet of text on the Manage > Dynamic Content page in Zendesk. For instructions, see Providing multiple language support with dynamic content. Example:

Add the content in the same language variants as the languages you support on your Help Center. If you don't specify a variant for a language, nothing will be displayed in that language in the Help Center. For example, suppose your Help Center supports English and French for a Canadian website. Add English and French variants of each snippet of text.

Make a note of the item name. You'll need it for the following step. In the previous example, the placeholder is {{dc.welcome_message}}, so the item name is "welcome_message".
Inserting the dynamic content in a template
- Click Customization panel in the tools panel on the lower-right side of any page.
- Click Edit HTML, and then select a template from the menu.
- Add the dynamic content in your template using the dynamic content helper. Example:
{{dc 'welcome_message'}} - To save your changes, click Save at the top of the sidebar.
For more information on working with templates, see Working with the page code.
Managing translated content
You can manage translated articles and sections by setting them to one or two states: Out-of-date or Draft.
- Use Out-of-date to flag articles that need to be updated.
- Use Draft to hide articles from users.
An API will be available soon to let you manipulate translations and their states. For example, you could get a list of all out-of-date articles to get them translated again.
- Navigate to the translated article or section you want to set.
- Click Edit in the tools panel on the lower-right side of any page.
- Click the Out of date or Draft options above the editor.
- Click Update translation.
- Navigate to the translated article or section you want to delete.
- Click Edit in the tools panel on the lower-right side of the page.
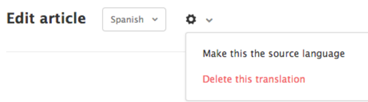
- Select the language of the translation you want to delete from the drop-down menu.
- Click the options menu. Select Delete this translation
Comments
0 comments
Please sign in to leave a comment.