

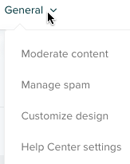
- In the Help Center, click General in the top menu bar, then select Customize design.
- Click to expand the Appearance section of the left sidebar.
You can change the look and feel of the Help Center using simple WYSIWYG design tools such as color pickers and font choosers. For example, you can change the logo, colors, and web font to make your Help Center follow your company's branding guidelines.
Here:
And here:
Branding is available to Team, Professional, and Enterprise customers.
This article discusses the following topics:
- Updating the colors and fonts in your Help Center
- Updating the logo and favicon of your Help Center
- Updating the images in your Help Center Copenhagen theme
- Updating the name of your Help Center
You can also watch this short video, which describes some of the options for customizing your Help Center:

For more information about customizing your Help Center, see the following articles:
Updating the colors and fonts in your Help Center
The Appearance section of the Customize design panel lets you control the colors and font used in your Help Center.
There are five color settings, and two font settings.
To update your Help Center colors and fonts
- In the Help Center, click General in the top menu bar, then select Customize design.
- Click to expand the Appearance section of the left sidebar.
- Under Colors, click the hexadecimal number for the color setting you want to change. The color settings control different areas of your Help Center layout, including font colors, depending on the theme you are using.
- Under Fonts, use the drop-down menus to select the font style you want to use. The font settings control the text in different areas of your Help Center layout, depending on the theme you are using.
- When you're satisfied with the design, click Publish changes at the top of the sidebar.

The changes are applied to the Help Center.
Updating the logo and favicon of your Help Center
The Appearance section of the Customize design panel also lets you update the brand-related elements of your Help Center.
For information on uploading your own images and other branding assets to use here, see Uploading and using your own assets.
To update the branding elements of your Help Center
- Click General in the top menu bar, then select Customize design.
- Click to expand the Appearance section in the left sidebar.
- Under Logo, click Change to browse to and select the default logo image displayed in the header.
The recommended image size is 200px by 50px. For the Copenhagen theme, the recommended maximum height is 37px.
If the width or height of the image exceeds the recommended size, the image is scaled down to keep the aspect ratio constant. To change the image dimensions, see Specifying logo dimensions, below. The image background should be transparent or match the background color of the header.
- Under Favicon, click Change to browse to and select the default favicon.
A favicon is the small image displayed in the browser tab and next to the URL in the browser's address bar. For best results, make sure the favicon is a square image. The image is scaled to fit the display dimensions.
- In the Powered by Zendesk logo section, click the check box to display or hide the Powered by Zendesk logo at the bottom of each Help Center page.
- When you're satisfied with the selection of branding elements, click Publish changes at the top of the sidebar.
Customizing the logo return URL
By default, clicking the logo image in your Help Center header returns users to the home page. You can edit the Help Center HTML to return users to a different URL.
To update the logo URL
- Upload your logo image to the Assets area, as described in Uploading and using your own assets. Make a note of the image's URL.
- Click General in the top menu bar, then select Customize design.
- Click Edit theme.
- Select Header from the drop-down menu, and locate the logo div tag in the HTML:
<div class="logo">{{logo}}</div> - Replace the {{logo}} placeholder in the div tag with the following HTML (in bold):
<div class="logo">
  <a href="http://new_url">
    <img src="https://path_to_image/image.png" />
  </a>
</div>
The code inserts a linked image in the page.
- Specify the URL of the page (new_url), the path to your logo image (path_to_image), and the image name (image), and save your changes.
Specifying logo dimensions
Although the recommended logo image size is 200px by 50px, you can override this default if needed.
To change your logo size
- Open the Header template (Customize Theme > Edit Theme > CSS) and find the logo div tag in the HTML:
<div class="logo">{{logo}}</div> - Replace the {{logo}} placeholder in the div tag with the following HTML:
<a href="https://yoursubdomain.zendesk.com/hc/">
  <img src="https://path_to_image/image.png" />
</a>
The code inserts a linked image in the page.
- Specify the subdomain of your Help Center home page in the href attribute, and the path to your hosted logo image in the src attribute.
- Open the Help Center CSS stylesheet (Customize Theme > Edit Theme > CSS) and search for the following rule:
.logo img {
  // your properties here may vary depending on your theme
}
Tip: To search, click inside the code editor and press Control+F (Windows) or Cmd+F (Mac).
- Modify the height property in the ".logo img" selector to match the height of the image.
.logo img { vertical-align: middle; height: 105px; } - Save your work.
Updating the images in your Help Center Copenhagen theme
The Copenhagen theme comes with three images that you can replace:
- Home banner

- Community banner

- Community image

To update the images in the Copenhagen theme
- Click General in the top menu bar, then select Customize design.
- In the Appearance section in the left sidebar, under Home banner, click Change to browse to and select an image.
For the Home banner and the Community banner, we recommend 1600x300px. You can use an image that is less than 1600px wide if you are concerned about load time, but ensure that your image is 300px in height so that is does not appear stretched.
The image appears in the theme so that you can preview it. If you don't want to use the image, you can click Discard changes to remove it.
- Repeat for the Community banner and Community image.
Again, ensure that the image you use for the Community banner is at least 300px in height. And the Community image, should be less than 300px in height to avoid stretching.
- Click Publish changes when you are ready.
Updating the name of your Help Center
You may want to change the name displayed on your Help Center. For example, your customers might be used to calling your content "Support, Help, and Tutorials," or "Documentation." The name doesn't affect the URL of the Help Center.
To update the name of your Help Center
- Click General in the top menu bar, then select Help Center settings.
- Scroll down to Languages.
- Find your default language, and enter the name you want displayed for your Help Center.
- At the top of the settings page, click Update. The new name appears on your Help Center.
Note: If you have a localized Help Center, other languages may appear in this section. For more information, see Localizing Help Center.
Comments
0 comments
Please sign in to leave a comment.